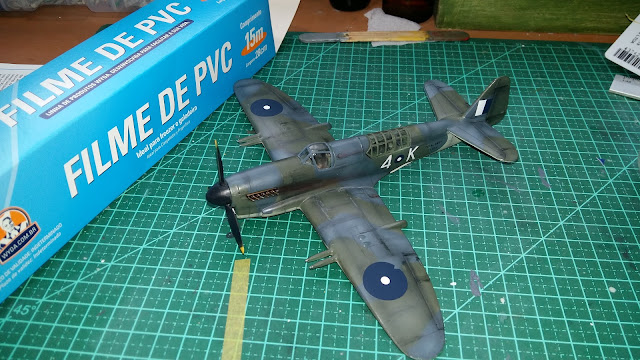
WIP: Fairey Firefly Mk.I Frog 1/72 Parte 7
Olá amigos! Hello!
Depois de decidir o que fazer quanto ao canopy do Firefly chegou a hora de colocar a mão na massa e terminar esse kit!
O maior problema das transparências estava na parte do trás, onde fica o cockpit do navegador. A peça vem moldada em duas partes e uma delas, a menor, estava bem torta. Tirando as rebarbas e lixando as laterais para melhorar o encaixe acabei com uma fresta de uns 1.5mm na parte de trás do cockpit.
After deciding what to do about the Firefly canopy, it's time to go back to the bench and finish this kit!
The biggest problem with the transparent parts was in the back of the canopy, where the navigator's cockpit is. The piece is molded in two parts and one of them, the smallest one, was very bent. After removing the flash and sanding the sides to improve the fit I ended up with a gap of about 1.5mm in the back of the cockpit.
A solução foi colar uma peça de plasticard no lugar para que a transparência tivesse um encaixe satisfatório. Mesmo assim, o acabamento do cockpit não ficou bom, principalmente na parte de trás do mesmo.
The solution was to glue a piece of plasticard in place so that the transparency had a good fit. Even so, the cockpit finish did not look good, especially on the rear part.
Depois partimos para a confecção da capa. Como o kit já estava praticamente pronto, inclusive com os decais já aplicados, usei um filme plástico de PVC, destes que se usa em cozinha, para enrolar e proteger o mesmo. Assim, eu consegui preservar o formato da fuselagem para moldar a capa e ainda proteger o kit.
Then we start to make the cover. As the kit was almost ready, including the decals already applied I used a plastic film of PVC used in the kitchen, to protect it. So I was able to preserve the fuselage shape to mold the cover and still protect the kit.
Depois disso, posicionei o papel sobre o kit (previamente já tinha cortado e medido o papel vegetal). Com cola branca misturada na proporção de 1/1 de água/cola comecei a colar o papel no kit. Deixei secar uns 10 minutos e já comecei a aplicar a cola sobre o papel, para deixar ele bem úmido.
After that, I placed the paper on the kit (previously it had already cut and measured the paper). With white glue mixed in the ratio of 1/1 of water / glue I began to glue the paper on the kit. I let it dry for about 10 minutes and I started to apply the glue on the paper to make it very wet.
Com o papel úmido já se pode moldar melhor as formas da capa, inclusive criando rugas e amassados que vão deixar tudo mais realista.
With the wet paper you can better shape the cover, including wrinkles that will make everything more realistic.
After the glue dries, just paint the cover in the color of your taste. I decided to make it brown, to stand out a bit of the gray tone of the kit. Here the techniques of light and shadow can make a big difference in the final aspect of the cover.
Com a pintura finalizada, retirei o filme de PVC que estava aderido no kit e recortei a capa para finalizar o processo.
With the paint job finished, I removed the PVC film that was glued on the kit and cut the cover to finish the process.
Aproveitei e pintei rapidamente uma figura para adicionar ao kit, vamos ver como vai ficar o Firefly finalizado!
I quickly painted a figure to add to the kit scene, let's now see how the Firefly will be after this!


Comentários
Postar um comentário