WIP: HMS Obedient Tamiya 1/700 "O" Class Destroyer parte 3
Voltamos ao nosso pequeno HMS Obedient, mas agora para fazer uma base para este navio. E esse é um dos tipos de bases que mais eu tinha vontade de fazer, a água, mar, oceano! E existem várias técnicas para fazer o efeito de água para a base de um navio. Pode-se utilizar resina poliéster, papel machê, massa acrílica, papel amassado, alumínio amassado, serragem com cola etc... Você pode ver algumas destas técnicas nos links no fim deste post.
We returned to our little HMS Obedient, but now to make a base for this ship. And this is one of the bases that I most wanted to make, water, sea, ocean! And there are several techniques for making the water effect for a base of a ship. You can use polyester resin, papier-mache, acrylic putty, crumpled paper, crumpled aluminum, sawdust with glue etc... You can see some of these techniques in the links at the end of this post.

First thing is to have a beautiful wooden base, which highlights the model well. As the kit is very small, it is important that this base is imposing and well made. In my case I decided to use a taller and more rectangular one. The technique I used involves only styrofoam, acrylic putty and paint / varnish. This technique is simpler to model, but requires more work when painting, as we will see below.


Com os espaços preenchidos, que ainda teremos que revisar, porque a massa acrílica tem a tendência de encolher, podemos passar para os detalhes menores, adicionando as marolas e outras texturas.


Primeiro passo é definir e delimitar onde o modelo ficará na cena, sempre é interessante usar o máximo da área disponível, mas sem deixar desequilibrada a composição. Eu usei o próprio modelo para definir como ficaria na base.
First step is to define and delimit where the model will be in the scene, it is always interesting to use almost all of the available area, but without leaving the composition unbalanced. I used the model itself to define how it would look on the base.

Mesmo que esse kit seja do tipo "waterline" resolvi "afundar" ele um pouco mais na base, e com um mar revolto e ondas dar alguma dramaticidade para a cena.
Even though this kit is of the "waterline"series, I decided to "sink" it a little more at the base, and with a rough sea and waves give some drama to the scene.

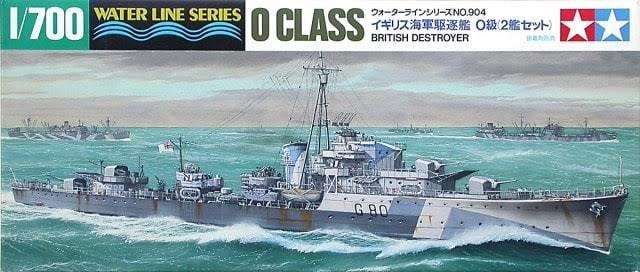
Além do mais, o HMS Obedient foi usado muito para escolta dos comboios de suprimentos que apoiavam a Rússia durante a II GM. E como sabemos, o Mar do Norte e de Barents não são nada calmos.
Furthermore, HMS Obedient was used extensively for escorting supply ships that supported Russia during II WW. And as we know, the North Sea and the Barents Sea are very rough seas.

Agora vamos começar a sujeira! Massa acrílica sobre o isopor, primeiro uma camada mais diluída, para fechar todas a fendas.
Now let's start the dirt part! Acrylic putty on the styrofoam, first a more diluted layer, to close all cracks.

Depois adicionamos a camada mais seca, para que possamos começar a dar forma às ondas, marolas e esteira do navio.
Then we add a drier layer, so that we can start shaping the waves and wake of the ship.

Com a base pré pronta, hora de colocar o modelo no lugar e preencher o espaço que por ventura tenha ficado entre o "mar" e o casco do navio. Para proteger o modelo, que está pronto, uso filme plástico de PVC, deste de cozinha mesmo. Ele adere bem a superfície do kit, mantendo o formato do navio sem sujar o mesmo.
With the base ready, time to put the model in place and fill the space that may have been between the "sea" and the hull of the ship. To protect the model, which is finished, I use PVC plastic film, those used in the kitchen. It will stick well to the kit surface, keeping the shape of the ship without getting it dirty.

With the spaces filled, which we still have to review, because the acrylic putty will shrink, we can move on to the smaller details, adding curls and other textures.

Com a massa bem seca e a textura finalizada, podemos passar para a pintura. Como vamos simular o alto mar de um mar setentrional, o tom de azul que precisamos deve ser escuro. Por isso começamos com uma base de preto entre as ondas maiores.
With the putty well dried and the texture finished, we can move on to painting. As we are going to simulate the high seas of a northern sea, the shade of blue we need must be dark. So we started with a black base between the bigger waves.

Depois usei um azul bem escuro (Hataka Dark Sea Blue) para preencher a maioria da área de mar.
Then I used a very dark blue (Hataka Dark Sea Blue) to fill most of the sea area.

Nas partes mais elevadas do relevo e próximo a crista das ondas usei um degradê com um azul mais claro (AMMO Medium Blue).
In the higher parts of the relief and near the crest of the waves I used a gradient with a lighter blue (AMMO Medium Blue).


Agora o trabalho é usar um azul ainda mais claro para o topo das ondas, até chegar no branco. Para isso usei as cores Light Blue da AK e RLM 65 Hellblau da Ammo.
Now the job is to use an even lighter blue for the top of the waves, until it reaches white. For this I used the colors Light Blue by AK and RLM 65 Hellblau from Ammo.

Para finalizar usamos branco puro para simular a espuma das ondas e algumas camadas de verniz brilhante. Pronto, falta só colar na base!
To finish, we use pure white to simulate the foam of the waves and some layers of gloss varnish. Okay, we just need to stick it on the base!
Mais algumas técnicas para imitar águia aqui / More sea diorama techniques here:


Comentários
Postar um comentário