WIP: Komet Airfield Diorama 1/72 Parte 2
Olá leitores! Hello readers!
Continuando com o projeto do Komet, e agora que a base do diorama está pronto vamos dar atenção para os demais "atores" da cena. Começando pelo próprio Me 163B Komet, kit da Academy na 1/72 que eu montei faz mais de 10 anos e resolvi reformar.
Keep working on the Komet project, and now that the base of the diorama is ready we will pay attention to the other "actors" in the scene. Starting with Me 163B Komet, an Academy kit on 1/72 scale that I built more than 10 years ago and decided to renovate.

Even though it has been built for a long time, in general terms, it is in good condition. It was a matter of removing the paint, cleaning the kit well and restarting the painting.


No Komet, apenas um trato nas linhas de painéis e um pouco de massa já foi suficiente para começarmos a preparação da pintura com o primer da AMMO by Mig.

O mesmo foi feito com o trator, mas nesse caso o trabalho foi bem maior, tendo em vista que modifiquei algumas coisas nele para que ficasse visualmente mais próximo do real. O principal foi o sistema da engate entre a peça motriz e o reboque, adicionei também algumas alças que o modelo original não tinha.

Iniciando a pintura, com o Dark Yellow feito em casa e o pré shading no Komet.


Para a camuflagem usei o set da AK Interactive, com o esquema RLM 74,75 e 76.


O grande desafio deste trabalho foi fazer a famosa camuflagem "mosqueada" da Luftwaffe com as tintas acrílicas, que são conhecidas por sua secagem rápida e pouca fluidez no aerógrafo.


Para finalizar, verniz brilhante no Komet e no trator, e o weathering nesse último com óleos e pigmentos.


Por fim, decais "home made" aplicados e kit praticamente finalizado.

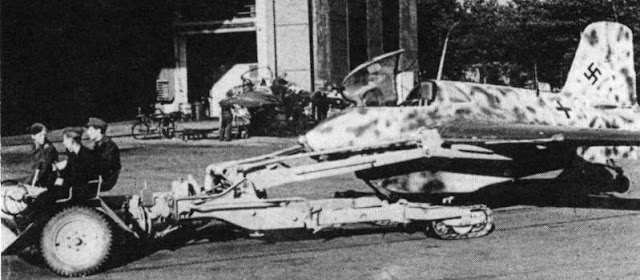
Esse kit da Academy traz um trator Scheuchschlepper que servia para transportar o avião depois do mesmo pousar sobre os skis, já que esse avião não tinha um trem de pouso. Infelizmente esse trator tem vários erros e simplificações.
This Academy kit includes a Scheuchschlepper tractor that was used to transport the plane after it landed on skis, since this plane did not have a landing gear. Unfortunately this tractor has several errors and simplifications.
At Komet, just a treatment on the panel lines and a little putty was enough to start preparing the painting with the AMMO by Mig primer.
The same was done with the tractor, but in this case the work was much greater, considering that I modified some things in it so that it was visually closer to the real thing. The main thing was the coupling system between the driving part and the trailer, I also added some handles that the original model did not have.
Let's start the paint job with home made dark yellow and pre shading on the Komet.
For the camo I used an AK Interactive set, with RLM 74, 75 and 76.
The great challenge of this work was to make the famous Luftwaffe "mottled" camouflage with acrylic paints, which are known for their quick drying and little fluidity in the airbrush.
É a primeira vez que fiz essa camuflagem para valer com as acrílicas, e posso dizer que realmente é mas complicado que com tintas base solvente. Principalmente quando se trata de temas muito pequenos, como o próprio Komet. Meu aerógrafo com agulha 2,0mm ficou ainda aquém daquilo que eu acho adequado em termos de traços para esse pequeno kit.
It is the first time that I made this camouflage for real with acrylics, and I can say that it really is more complicated than with solvent based paints. Especially when it comes to very small subjects, like this Komet himself. My airbrush with 2.0mm needle still fell short of what I think is appropriate in terms of details for this small kit.
De toda forma isso não quer dizer que não seja possível fazer esse tipo de camuflagem, afinal devemos ainda lembrar que minhas habilidades não sejam assim tão grandes. Desta maneira, resolvi fazer um misto de técnicas, fazendo uma base do mosqueado com o aerógrafo e finalizando com um pincel bem fino e tinta bem diluída, para chegar na escala correta da camuflagem.
Anyway, this does not mean that it is not possible to make this type of camouflage, after all we must still remember that my skills are not that great. In this way, I decided to make a mix of techniques, making a mottled base with the airbrush and finishing with a very fine brush and very diluted paint, to arrive at the correct camouflage scale.
To finish it, gloss varnish on both and weathering with oils and pigments.
Wash e mais weathering com óleos e produtos especificos da AMMO by Mig.
Wash and more weathering with oils e other products from AMMO by Mig.
At last, home made decals applied and the model amost finished.
Em seguida mais uma etapa do Komet Airfield Diorama!
Stay tooned for more on Komet Airfield Diorama!


Comentários
Postar um comentário